Environmentally Friendly Fashion Combining Style and Durability

In today’s world, where sustainability is becoming increasingly important, it’s essential to consider the environmental impact of our choices, even in the realm of fashion. The good news is that you don’t have to sacrifice style or quality when looking for environmentally friendly clothing options. With advancements in technology, we now have access to garments that are not only eco-conscious but also built to last. Enter the world of environmentally friendly fashion with abrasion resistance - where sustainability meets durability.

The Need for Sustainability in Fashion

The fashion industry has often been criticized for its negative environmental impact. From excessive water usage to chemical pollution, the fast fashion model takes a toll on our planet. But as consumers become more aware, demand for sustainable alternatives is on the rise. Environmentally friendly fashion aims to address these issues by prioritizing eco-conscious production practices, reducing waste, and embracing longevity.

Introducing Abrasion Resistance

Abrasion resistance refers to a fabric’s ability to withstand wear and tear, reducing the chances of it wearing out quickly. By employing durable materials in the production process, environmentally friendly fashion brands can create garments that stand the test of time. This means fewer replacements, less waste, and a reduced carbon footprint.

High-Quality Materials for Long-lasting Fashion

To achieve abrasion resistance, environmentally friendly fashion brands often employ materials that are known for their durability. Natural fibers, such as organic cotton and linen, offer not only comfort but also exceptional strength. They can withstand frequent washing and everyday practical use without losing their shape or integrity.

Furthermore, innovative synthetic materials like recycled polyester or nylon are being utilized, diverting plastic waste from landfills and oceans. By repurposing these materials, fashion brands contribute to a circular economy, where products are recycled and reintegrated into the production cycle.

Benefits of Environmentally Friendly, Abrasion-Resistant Fashion

  1. Sustainability: Choosing environmentally friendly fashion means reducing your carbon footprint and contributing to a more sustainable future for our planet.

  2. Longevity: By investing in high-quality, abrasion-resistant garments, you ensure that they will last longer and remain in your wardrobe for years to come.

  3. Versatility: These durable pieces can be styled in a multitude of ways, allowing for greater versatility and reducing the need for constant fashion purchases.

  4. Affordability: While environmentally friendly fashion may initially seem more expensive, the long lifespan of these garments makes them a cost-effective choice in the long run.

  5. Ethical Choices: Many environmentally friendly fashion brands also prioritize fair labor practices, ensuring that the people involved in production are treated fairly and paid a living wage.

Embracing the Future of Fashion

As consumers, it’s important for us to make conscious choices when it comes to fashion purchases. By opting for environmentally friendly, abrasion-resistant garments, we can support brands that value sustainability and durability. Not only will this positively impact our planet, but it will also contribute to a more ethical and long-lasting fashion industry.

So, let’s step into a more sustainable future, where style and durability go hand in hand. Together, we can make a difference, one environmentally friendly fashion choice at a time.
Top

What type of seals can be used for Well Completion?

Well completion is the process of making a well ready for production after drilling. As in well drilling, seals used in well completion have to cope with the increasingly harsher conditions of deeper wells and diverse geographical areas, from the heat of Africa to the cold of Canada, Norway or Russia, with storage conditions as low as to -60℃. The system pressure can vary from 345 bar to 2070 bar, and the temperature can vary from -45 ℃ to 220 ℃. Seals in well completion applications have to deliver the required chemical compatibility, resistance to aggressive fluids and steam injection at very high temperatures of 315℃, as well as extended service life.


Applications

Tubing heads and hangers

Packer assemblies

Collet connectors

Well controls

Christmas trees

Cementing equipment

Well head completion assemblies

Well service


Challenges

Temperature extremes

High pressures

Chemical compatibility, including H2S

Steam resistance

Extrusion resistance

RGD(Rapid Gas Decompression) resistance

Low friction


Products

jst-seals O-rings

Back-up rings

PolyPak seals

S-seals

Chevron packing sets

Packer elements

Packer cups

Seal stacks

Casing hanger seals

Tubing hanger seals

Metal end cap seals

Custom molded seals

Custom machined seals


Top

The Ultimate Guide to TPU Tapes Tips and Tricks for Enthusiasts

TPU tapes have gained immense popularity in various industries due to their superior properties and versatility. From fashion to electronics, TPU tapes are used for a wide range of applications. If you’re an enthusiast looking to learn more about TPU tapes and how to use them effectively, you’ve come to the right place! In this comprehensive guide, we’ll provide you with valuable tips and tricks to make the most out of your TPU tape experience.

1. Understand the Basics

To fully leverage TPU tapes, it’s crucial to grasp their fundamental characteristics. Thermoplastic Polyurethane (TPU) tapes are known for their excellent elasticity, durability, and resistance to water, chemicals, and abrasion. Familiarize yourself with the specific type of TPU tape you’re working with, as different grades and thicknesses may be suited for distinct uses.

2. Choose the Right TPU Tape for Your Project

With a variety of TPU tapes available, it’s important to select the one best suited for your project. Consider factors such as adhesive strength, flexibility, width, and color. Whether you’re working on clothing repairs, outdoor gear, or electronic components, choosing the appropriate TPU tape will ensure optimal performance and longevity.

3. Prepare the Surface

Before applying TPU tape, ensure that the surface is clean, dry, and free from any dirt, dust, or grease. Wiping the surface with a mild solvent or cleaner can ensure better adhesion. Additionally, roughening the surface slightly with sandpaper can enhance the bonding strength of the tape.

4. Apply TPU Tape Properly

When applying TPU tape, it’s important to follow the correct technique. Start by cutting the tape to the desired length and shape. Peel off the backing gradually while smoothing the tape onto the surface to minimize air bubbles. Apply even pressure to ensure a secure bond. If necessary, use a heat gun to activate the adhesive and enhance adhesion.

5. Explore Creative Uses

TPU tapes offer immense versatility, so don’t be afraid to get creative! Use them for repairing clothing, shoes, or accessories. Create waterproof seals for tents or tarps during outdoor adventures. Secure loose wires or cables in electronic devices. The possibilities are endless!

6. Store TPU Tapes Properly

To maintain the quality of your TPU tape, store it in a cool, dry place away from direct sunlight. Extreme temperature and humidity can affect the adhesive properties of the tape, so proper storage is essential for long-term usability.

7. Experiment and Learn from Others

Don’t hesitate to experiment with different techniques and learn from fellow TPU tape enthusiasts. Join online communities or forums where you can share and gain knowledge about new applications and troubleshooting tips.

In conclusion, TPU tapes offer a reliable and versatile solution for various projects. By understanding their properties, choosing the right tape, and applying it correctly, you can achieve excellent results. So go ahead, explore the world of TPU tapes, and unlock their full potential!

Top

A Beginner's Guide to Using LYCRA Fabric Tape

Have you ever wanted to enhance the stretch and durability of your fabric projects? Look no further than LYCRA fabric tape! LYCRA fabric tape is a versatile product that can be used to reinforce seams, create borders, and add stretch to various garments and accessories. In this beginner’s guide, we will take you through a step-by-step process of using LYCRA fabric tape effectively.

Step 1: Gather Your Supplies

Before you begin, make sure you have all the necessary supplies ready. You will need:

  • LYCRA fabric tape

  • Fabric scissors

  • Pins

  • A seam ripper (if required)

  • An iron and ironing board

  • A sewing machine (optional)

Step 2: Prepare Your Fabric

Start by washing and drying your fabric according to its care instructions. This ensures that the fabric won’t shrink or warp after applying the LYCRA fabric tape. Next, lay out the fabric on a flat surface and smooth out any wrinkles.

Step 3: Measure and Cut the LYCRA Fabric Tape

Take the LYCRA fabric tape and measure the length needed for your project. Use fabric scissors to carefully cut the tape to the desired size. Remember to add a little extra length to ensure a secure bond.

Step 4: Position the LYCRA Fabric Tape

Place the fabric tape on the desired area of your fabric. If you’re reinforcing a seam, position the tape along the seamline on the wrong side of the fabric. For stretchier borders, position the tape around the edges of your project.

Step 5: Secure the LYCRA Fabric Tape

Using pins, secure the fabric tape in place. Make sure the pins go through the tape and fabric layers to hold everything together. This step helps in keeping the fabric tape steady while sewing.

Step 6: Iron the Fabric Tape

Now it’s time to activate the adhesive on the LYCRA fabric tape. Set your iron to the appropriate heat setting for your fabric type (consult the fabric care label if unsure). Place a pressing cloth over the fabric tape and press it with the iron, applying gentle pressure. Move the iron in a slow, continuous motion to ensure even heat distribution. Continue ironing for the recommended duration specified by the LYCRA fabric tape manufacturer.

Step 7: Remove Pins and Inspect

Once you’re done ironing, remove the pins from your project. Gently peel back a corner of the fabric tape to check if it adhered securely. If any areas need further bond reinforcement, reposition and repeat Step 6.

Step 8: Finish Up

After ensuring the fabric tape is securely bonded, you can proceed with the rest of your project. If desired, you can sew along the edges of the fabric tape for added durability. Remember to follow sewing machine instructions and use the appropriate needle and thread.

Congratulations! You have successfully learned how to use LYCRA fabric tape. It’s an incredible tool that can help you achieve professional-looking results with added stretch and strength. Don’t hesitate to experiment with different applications and projects, and remember to have fun in the process.

Top

A Beginner's Guide to Using Printed TPU Tapes Step-by-Step

If you’re new to the world of printed TPU tapes, you might be wondering how to get started and make the most out of this versatile material. Look no further! In this beginner-friendly guide, we’ll walk you through the step-by-step process of using printed TPU tapes. So let’s dive in!

Step 1: Understand the Basics

Before you begin, it’s essential to have a clear understanding of what TPU tapes are and how they can be used. TPU stands for Thermoplastic Polyurethane, a material known for its elasticity, durability, and resistance to oil, grease, and abrasion. Printed TPU tapes are great for various applications, including labeling, product identification, and branding.

Step 2: Identify Your Application

Next, consider the specific purpose for which you’ll be using the printed TPU tapes. Are you looking to label garments, equipment, or industrial products? Understanding your application will help you choose the right type, size, and design for your TPU tapes.

Step 3: Select the Right TPU Tape

When selecting a printed TPU tape, take into account factors such as adhesion strength, resistance to external conditions (e.g., heat, moisture), and the type of surface you’ll be applying it to. Ensure that the tape’s adhesive is compatible with the surface material to ensure long-lasting adhesion.

Step 4: Design and Print Your TPU Tape

Now comes the fun part – designing and printing your TPU tape! If you have access to a specialized TPU tape printer, you can create custom designs, including text, logos, and graphics. Alternatively, you can work with a professional printing service to bring your design ideas to life.

Step 5: Prepare the Surface

Before applying the TPU tape, make sure the surface is clean, dry, and free from any dust or oils. This will ensure optimal adhesion and longevity of the tape. Use a mild cleaning agent if necessary, then allow the surface to dry completely.

Step 6: Apply the TPU Tape

Carefully peel off the backing from the TPU tape, taking care not to touch the adhesive. Align the tape on the desired surface and gently press it down, smoothing out any bubbles or wrinkles as you go. Apply firm pressure to ensure a secure bond.

Step 7: Test and Evaluate

After applying the TPU tape, give it some time to settle and cure. Test its adhesion by lightly tugging on the edges. If it holds strong, you’re good to go! Remember to evaluate the tape’s performance periodically, especially if exposed to harsh conditions.

Conclusion

Congratulations! You’ve now learned the basics of using printed TPU tapes. As a beginner, following these step-by-step instructions will ensure you get the most out of this versatile material. Whether you’re labeling garments or branding your products, printed TPU tapes offer durability and versatility that you’ll find invaluable. So go ahead, get creative, and start using printed TPU tapes in your projects today!

Top

Environmentally Friendly, Mellow Hand, High Temperature Resistance A Revolution in Hand Tool Design

Hand tools have been an essential part of human civilization for centuries, enabling us to shape the world we live in. However, with increasing concerns about environmental sustainability and the need for high-performance tools, it’s crucial to explore innovative solutions.

Enter the environmentally friendly, mellow hand tool with high-temperature resistance. Combining cutting-edge technology with sustainable materials, these tools are revolutionizing the way we work while minimizing our impact on the environment.

Embracing Sustainability

In today’s world, sustainability is key. Environmentally friendly hand tools are crafted with sustainable materials, such as recycled metals, bamboo, and biodegradable plastics. By reducing our dependence on non-renewable resources, these tools help protect our planet for future generations.

But sustainability isn’t limited to the materials used. Manufacturers also focus on the entire lifecycle of the tools. From the production process to the packaging, environmental impact is minimized at every stage. By choosing tools that are not only functional but also sustainable, we can actively participate in creating a better future.

Mellow Hand - A Revolution in Comfort

Traditional hand tools often lack ergonomic design, leading to discomfort and fatigue after prolonged use. Mellow hand tools, on the other hand, prioritize user comfort. Their carefully crafted designs consider the natural grip of the hand, reducing strain and promoting a more relaxed working experience.

Using mellow hand tools, workers can enjoy increased precision and productivity while reducing the risk of musculoskeletal disorders. By prioritizing our well-being, these tools are enabling us to work efficiently and safely, ultimately leading to higher-quality results.

The Power of High Temperature Resistance

In many industries, high temperatures are a constant challenge. Conventional tools can deform or lose their effectiveness under extreme heat, hindering productivity and posing safety risks. That’s where high-temperature resistant hand tools come into play.

The innovative materials and engineering behind these tools allow them to withstand extreme heat without compromising performance. From automotive repairs to industrial applications, high-temperature resistant hand tools ensure reliability and durability even in the toughest conditions.

A Greener Future Starts with Our Choices

By embracing environmentally friendly, mellow hand tools with high-temperature resistance, we can make a significant impact on both our immediate work environment and the planet as a whole. These tools provide us with the performance we need while reducing waste and enhancing our well-being.

Whether you’re a professional craftsman or a DIY enthusiast, the choice to use these innovative tools is a statement of our commitment to a greener future. Let’s protect the environment while creating remarkable works of art or maintaining the machines that drive our world forward.

Invest in the future today and experience the difference that environmentally friendly, mellow hand tools with high-temperature resistance can make in your work and in our world. Together, we can shape a sustainable future, one tool at a time.

Top

A Step-by-Step Guide to Using 3-PLY Cloth Tapes

Cloth tapes are versatile and practical tools used in various applications, from DIY projects to professional use. Among the different types available, 3-PLY cloth tapes stand out for their strength and durability. If you are new to using this type of tape, don’t worry! In this step-by-step guide, we will walk you through the process of using 3-PLY cloth tapes effectively.

Step 1: Choose the Right Tape

Before you start using 3-PLY cloth tapes, it’s essential to select the right tape for your specific needs. Consider factors like the type of surface you’ll be applying it to, the required strength, and the environmental conditions it will be exposed to. Ensure that the width and length of the tape meet your project requirements.

Step 2: Prepare the Surface

For optimal adhesion, it’s crucial to prepare the surface before applying the tape. Make sure the area is clean, dry, and free from any debris or loose particles. Remove any oil, dust, or dirt by using a mild detergent and water. Dry the surface thoroughly before moving on to the next step.

Step 3: Cut the Tape

Measure and cut the desired length of the 3-PLY cloth tape using a sharp pair of scissors or a utility knife. Ensure that the tape is long enough to meet your requirements but not excessively so that it becomes challenging to handle.

Step 4: Apply the Tape

Starting from one end, carefully peel off the backing of the tape, exposing the adhesive side. Slowly and evenly apply the tape onto the prepared surface, pressing it firmly as you go along. Ensure there are no bubbles, wrinkles, or gaps between the tape and the surface.

Step 5: Secure the Tape

Once you have applied the tape, press down firmly on its entire surface to enhance the adhesion and ensure a tight bond. Use a roller or the flat side of a tool to smooth out any potential air pockets or creases. This step ensures a tight seal and optimal performance of the tape.

Step 6: Check for Proper Adhesion

Once the tape is secured, inspect the adhesion to ensure it is firmly stuck to the surface. Gently tug on the tape to verify it is well-attached without any signs of peeling or lifting. If there are any areas that seem loose, press them down again firmly to ensure proper bonding.

Step 7: Test the Tape

Before the tape is subject to any significant stress or load, perform a test to ensure its effectiveness. Apply a moderate amount of pressure or stress to check if the tape holds up as expected. This step helps identify any issues early on and allows for necessary adjustments or reinforcements if needed.

Congratulations! You have successfully used 3-PLY cloth tapes. Whether you are using them for packaging, repairs, or any other application, following these steps will help you achieve optimal results.

Remember, these steps provide a general guideline for using 3-PLY cloth tapes. Always refer to the manufacturer’s instructions and recommendations for specific details related to the tape you are using. With practice, you will become more comfortable using cloth tapes and discover their wide range of applications in your projects.

Top

Dust Filter Bag Materials Polyester vs Nomex vs Fiberglass - What is Best for Your Application?

Description: Selecting the optimal filter bag material is crucial for maximizing the performance and lifespan of industrial dust collection systems. This article provides a detailed comparison of the three most common types of filter bags - polyester, Nomex, and fiberglass. Learn about the unique properties, advantages, disadvantages, and ideal applications for each filter material. Discover which factors to consider such as operating temperature, chemical resistance, efficiency, abrasion resistance and cost. Get recommendations on choosing the right filter bag for your specific emission stream and process conditions. With this guide, you'll be equipped to select the perfect filter bags to meet your plant's particulate emissions control needs. The proper baghouse filter bag material improves filtration efficiency, reduces operating costs, and ensures compliance with air quality standards.

* Polyester Filter Bags:

Advantages of Polyester Filter Bags:

Polyester felt is one of the most common dust filter bag materials due to its balance of performance and cost-effectiveness. Polyester filter bags are constructed of polyester fibers woven into a felt material.

1. Low Cost - Polyester is the least expensive filter media, making it economical for many applications. The bags are easy to manufacture.

2. Widely Available - Many suppliers offer polyester bags in a range of sizes and configurations for simple replacement.

3. Adequate Temperature Resistance - Can withstand temperatures up to 180°C continuously, suitable for many flue gas streams.

4. Moisture Resistance - Polyester has moderately good resistance to humidity and water.

5. Easy Handling - The lightweight polyester construction makes installation and change-out simpler.

Disadvantages of polyester filter bags:

Not recommended for fine particulate filtration applications.

You can also directly consult our sales engineers for free consultation services regarding your dust collection and denitrification projects.

↓ ↓ ↓ ↓ ↓
Contact us now!


* Nomex Filter Bags:


Nomex filter bags are made of high-temperature resistant synthetic fibers that provide excellent filtration performance in hot, demanding industrial applications. Nomex bags offer superior chemical and abrasion resistance, lasting up to twice as long as other filter materials.

Advantages of Nomex Filter Bags:

1. High Maximum Temperature - Can withstand continuous temperatures up to 260°C, with excursion temperatures up to 310°C. This makes Nomex suitable for hot flue gas streams.

2. Chemical Resistance - Nomex has excellent resistance to acids, alkalis, greases, oils and a wide range of organic solvents. It is unaffected by most chemicals encountered in industrial flue gas.

3. Long Service Life - Nomex is highly resistant to abrasion and flexing compared to other filter materials. Properly installed Nomex bags can last up to twice as long as polyester or fiberglass.

4. High Filtration Efficiency - The sub-micron Nomex fibers have a fine web structure that achieves high capture efficiency, especially for PM2.5 particulates.

5. Anti-Static Properties - The conductivity of Nomex prevents a static charge buildup that could lead to poor filtration and bag explosions.

Disadvantages of Nomex Filter Bags:

Conductivity - The conductive nature of Nomex requires special grounded handling procedures during bag changeouts.

You can also directly consult our sales engineers for free consultation services regarding your dust collection and denitrification projects.

↓ ↓ ↓ ↓ ↓
Contact us now!


* Fiberglass filter bags:


The fine glass fibers trap submicron particulate down to PM1 levels with 99%+ efficiency. Fiberglass offers excellent corrosion resistance and high load capacity in wet or dirty gas streams.

Advantages of Fiberglass Filter Bags:


1. High Temperature Tolerance - Fiberglass maintains integrity up to 400°C continuous temperature, with excursions over 500°C. Applicable for very hot flue gas streams.

2. Excellent Filtration Efficiency - The fine glass fibers trap submicron particulate very effectively. Fiberglass typically achieves 99%+ filtration efficiency.

3. Rigid Construction - The stiff and resilient nature of fiberglass strands maintains the filter bag shape and permeability.

4. Corrosion Resistance - Unaffected by moisture or chemical corrosion and suitable for scrubber applications.

5. High Load Capacity - The durable glass strands enable high dust holding capacity and long service life.

Disadvantages of Fiberglass Filter Bags:

Cost - More expensive than polyester or Nomex, offset somewhat by long lifespan.


You can also directly consult our sales engineers for free consultation services regarding your dust collection and denitrification projects.

↓ ↓ ↓ ↓ ↓
Contact us now!

Recommendations:

Provide guidance on selecting material based on operating temps, emissions types, cost factors
Suggest consulting with filtration experts for specific application requirements

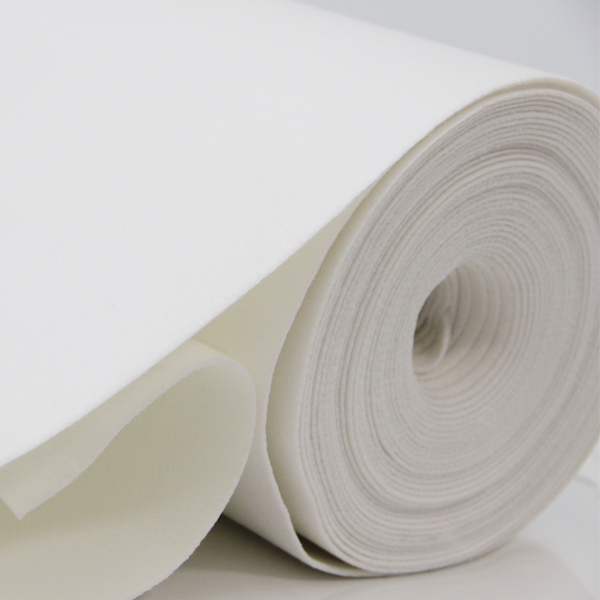
dust filter bag fabric picture


Founded in 2005, Yuanchen Technology focuses on technology development and application in the field of environmental protection, pioneering and innovating in industrial flue gas filtration, denitrification, circular economy, intelligent environmental protection, etc. It is committed to the frontier of industry technology and promotes the integration of new business models in the environmental protection industry, and is an enterprise with the qualification of R&D, design and production of high-efficiency filter media and SCR denitrification catalysts as well as recycling and reclamation of used catalysts, with CNAS and CMA testing qualification.

Top

Application of diaphragm pumps in chemical industry

Diaphragm air pump is a kind of pump with unique performance. It has simple structure, convenient operation and stable operation, and can be widely used in various fields. In the chemical industry, diaphragm pumps play an important role. This article will introduce in detail the application and advantages of diaphragm pumps in the chemical industry.


Applications in chemical industry:


1.Acid and alkali transportation: In chemical production, it is often necessary to transport various acid and alkali liquids. Due to its corrosion resistance, the pp diaphragm pump can effectively prevent leakage and corrosion of acid and alkali liquids, ensuring the safety and stability of the production process.


2. Transportation of flammable and explosive liquids: For flammable and explosive liquids, there are certain safety hazards in using traditional pumps to transport them. Due to its good sealing performance, the diaphragm pump can effectively prevent the occurrence of explosions and ensure the safety of the production process.


3. Transportation of high-temperature and high-pressure liquids: In chemical production, some liquids need to be transported under high-temperature and high-pressure conditions. Due to its simple structure, high temperature and high pressure resistance, the diaphragm pump can meet the transportation needs under such special conditions.


4. Transportation of liquids with solids: Traditional pumps are often unable to handle the transportation of liquids with solids. The diaphragm pump can effectively solve the problem of liquids with solids transportation due to its unique structural design and use of wear-resistant materials.


Advantages of diaphragm pumps:


1. High safety: The diaphragm pump has excellent sealing performance, which can effectively prevent liquids leakage and explosion phenomena, thus ensuring the safety and stability of the chemical production process.


2. Wide range of applications: Diaphragm pumps can transport various types of materials, such as liquids, gases and solids, and are not affected by the corrosiveness and viscosity of the materials. Therefore, diaphragm pumps can be widely used in various chemical production fields.


3. Easy maintenance: The diaphragm pump has a simple structure, easy operation, and low maintenance difficulty. In addition, most of the parts of the diaphragm pump are standard parts, which are easy and quick to replace.


3. Economical and affordable: The diaphragm pump has a long service life, low maintenance cost, and can be used for a long time after a one-time investment. In long-term use, diaphragm pumps can save companies a lot of maintenance and replacement costs.


Conclusion:

As a kind of pump with unique performance, chemical diaphragm pump plays an important role in the chemical industry. Its simple structure, convenient operation and stable operation make it an ideal choice in chemical production. In the future development, with the continuous advancement of technology and the continuous expansion of application fields, diaphragm pumps will play a more important role in the chemical industry.

Top

A Beginner's Guide to Using Hot Melt Adhesive Films

Hot melt adhesive films are versatile and efficient bonding solutions that have gained popularity in various industries. Whether you’re a DIY enthusiast or a professional, using hot melt adhesive films can simplify your projects and provide durable results. This step-by-step guide will walk you through the process of using hot melt adhesive films, so you can confidently tackle your next bonding task.

Step 1: Prepare Your Work Surface

Before you start using hot melt adhesive films, it’s essential to prepare your work surface. Make sure the area is clean, dry, and free from any dust or debris. This will ensure a strong bond and prevent any imperfections in your final project.

Step 2: Gather Your Materials

To begin, gather all the necessary materials for your bonding project. You will need:

  • Hot melt adhesive film: Select the appropriate film based on the materials you want to bond. Consider factors like temperature resistance, flexibility, and adhesion strength.

  • Substrates: The surfaces you intend to bond together.

  • Heat source: A hot iron, heat gun, or specialized hot melt adhesive applicator.

  • Protective gear: Heat-resistant gloves to protect your hands.

Step 3: Cut the Adhesive Film

Measure and cut the hot melt adhesive film according to your project’s requirements. Use a clean cutting tool, such as a utility knife or scissors, to ensure precise cuts. Make sure the film pieces are slightly smaller than the surfaces you want to bond for a neat and seamless finish.

Step 4: Apply Heat

Now it’s time to activate the adhesive. Choose the appropriate heat source and preheat it to the recommended temperature mentioned in the adhesive film’s instructions. Begin by placing the adhesive film on one substrate, aligning the edges.

Step 5: Bond the Surfaces

Once the adhesive film is in position, apply heat to the film’s surface using your chosen heat source. Move the heat source evenly across the film, ensuring it melts uniformly. Use gentle pressure to press the second substrate against the melted adhesive film. Hold the substrates together firmly for a few seconds to allow the adhesive to cool and solidify.

Step 6: Finishing Touches

After bonding the surfaces, inspect the joint to ensure a secure and even bond. Trim any excess adhesive film using a sharp tool for a clean and professional appearance. Allow sufficient time for the adhesive to fully cure before subjecting your project to stress or load.

Step 7: Clean Up

Hot melt adhesive films can leave residue behind. Clean any excess adhesive using a solvent recommended by the manufacturer or a scraping tool. Dispose of waste materials properly according to local guidelines.

Congratulations! You have successfully used hot melt adhesive films to bond your materials.

Using hot melt adhesive films offers a fast, clean, and reliable bonding solution for various projects. With these step-by-step instructions, even beginners can achieve professional-grade results. So, get started and explore the possibilities of hot melt adhesive films in your next crafting or repair endeavor.

Top